Get That Protective Sleeve Onto Your Pole
Your PoleClinometer® sticker needs protection! The clear heat-shrink sleeve that comes with it is the burliest protection you can get. But how do you get it onto your pole? Well, it depends. Usually one of these ways…

Got fixed-length ski poles? Remove the pole basket in order to slide the sleeve up your ski pole shaft. All ski pole baskets are removable. If you have trouble removing yours, check with your local ski shop or contact the ski pole manufacturer for assistance.

Got adjustable ski poles? Just remove the lower pole section, and slide the sleeve into place from there.

If the sleeve doesn’t fit over the adjustment lever, you can (usually) remove the adjustment lever mechanism itself too. Some detailed suggestions for a few specific pole models are included at the bottom of this page.

If something non-removable prevents you from sliding the protective sleeve up your ski pole shaft from the bottom, then you might try removing the grip instead to slide the sleeve on from the top. It’s pretty easy in most cases. Just soak the grip in scalding hot water for a couple minutes to loosen the adhesive, then pull (using gloves!) the grip off the shaft. Most of the adhesive should stay in place on the pole shaft, so after installing the PoleClinometer sleeve, just soak the grip and grip end of the pole shaft in scalding hot water again to re-soften the adhesive, then push the grip firmly back onto the pole shaft. Extra bonus: a chance to fine-tune the alignment of the grip to your PoleClinometer sticker (in twist) before the adhesive sets.
Need Another Option?
 Do NOT use clear packaging tape!! The sleeve that came with your PoleClinometer kit is the very best way to protect the sticker. But if you really can’t get it installed over your sticker for one reason or another, please contact us and we’ll send you a tough clear protective adhesive sheet that’s almost as good. Clear packaging tape is NOT the solution; it’ll degrade in sun and weather, and will end up doing more harm than good. Please let us send you something much better.
Specific Pole Models
Here are some detailed suggestions specific to a few makes of ski pole…
Backcountry Access
The adjustment lever on BCA’s “Scepter” poles is not easily removable. The best way to install the protective sleeve on these poles is to remove the grip. The above “Remove the Grip” instructions work great on these poles.
Black Diamond
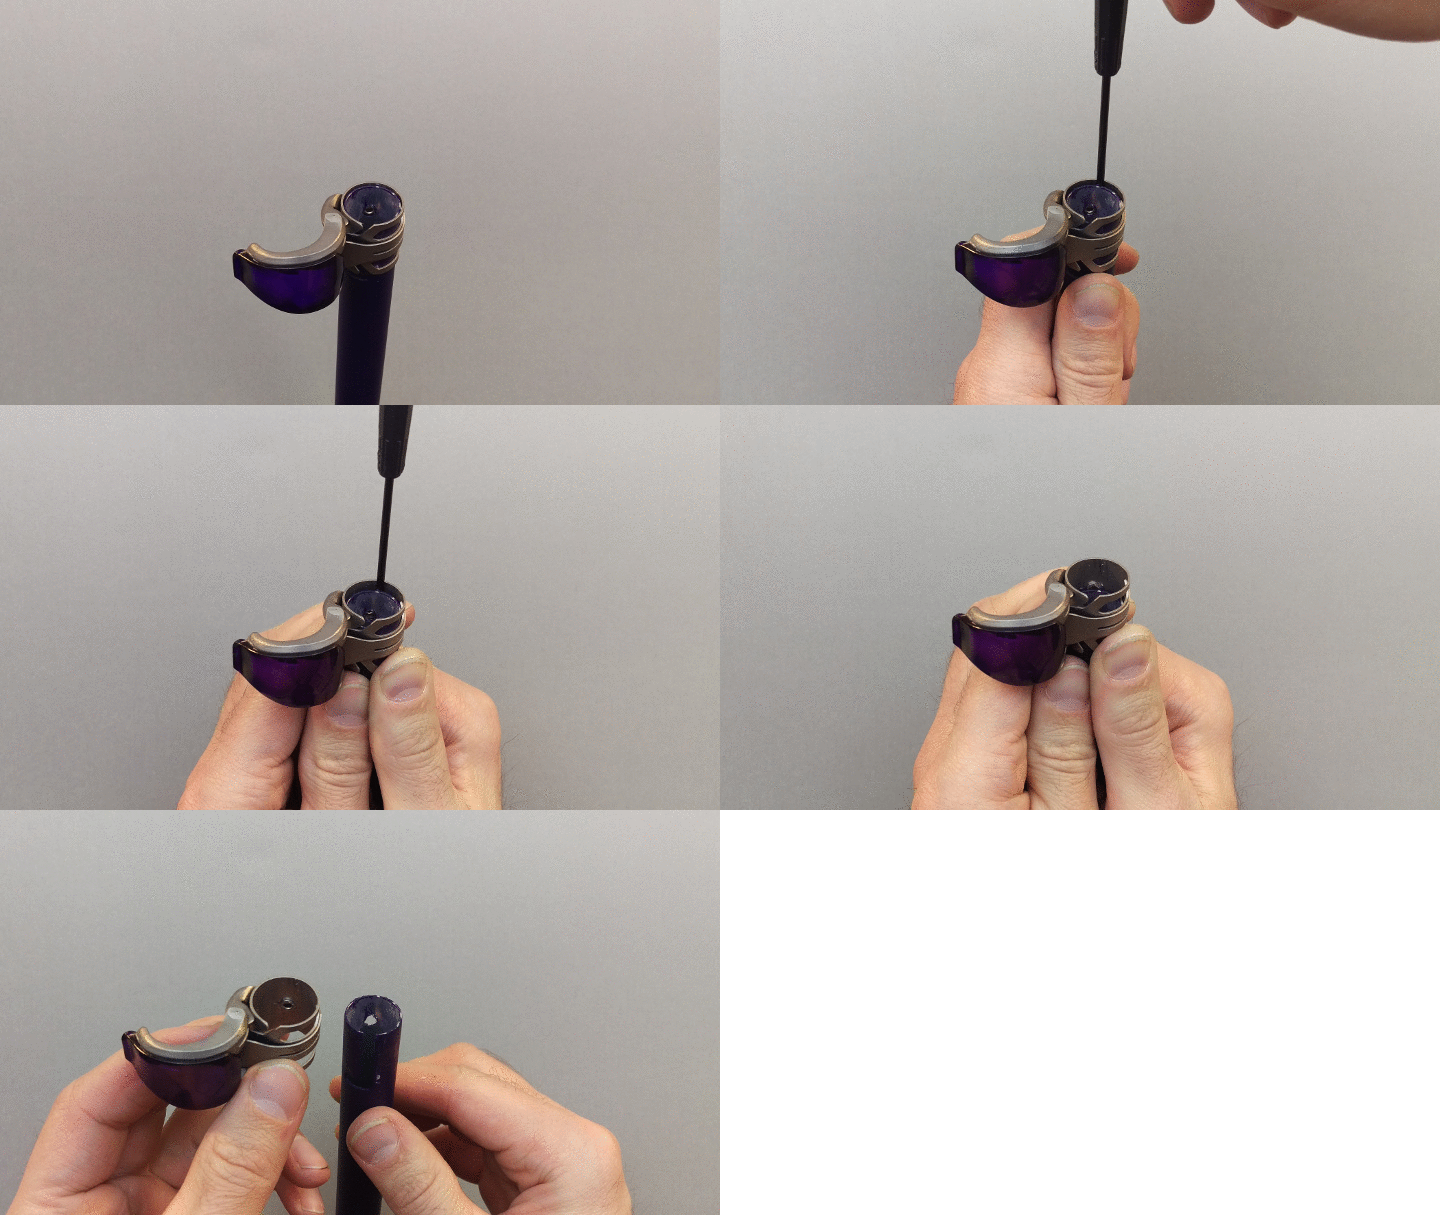
BD’s “FlickLock Pro” adjustment mechanism (i.e. the all metal levers) can be easily removed using a small screwdriver, as shown in the below animated image. Just remember which way the lever goes to be sure you put it back on the same way; it’ll go back on upside down just as easily, but then won’t work as well.
The plastic FlickLock mechanism on older BD poles is even easier – comes off the same way, except no screwdriver needed. Just when you put it back on be sure the gap in the FlickLock mechanism lines up with the slit in the end of the pole shaft. Easy peasy.
Got the “Traverse” poles? It’s a really tight fit over that side-hilling grip, but it’ll go if you employ this simple trick… Use a junk sticker (i.e. one of the sizes you don’t need) as shown below to help you get the sleeve up over the side-hilling grip. Just be sure to trim your sleeve to length first! Otherwise it won’t fit between the main grip and the side-hilling grip.
Genuine Guide Gear
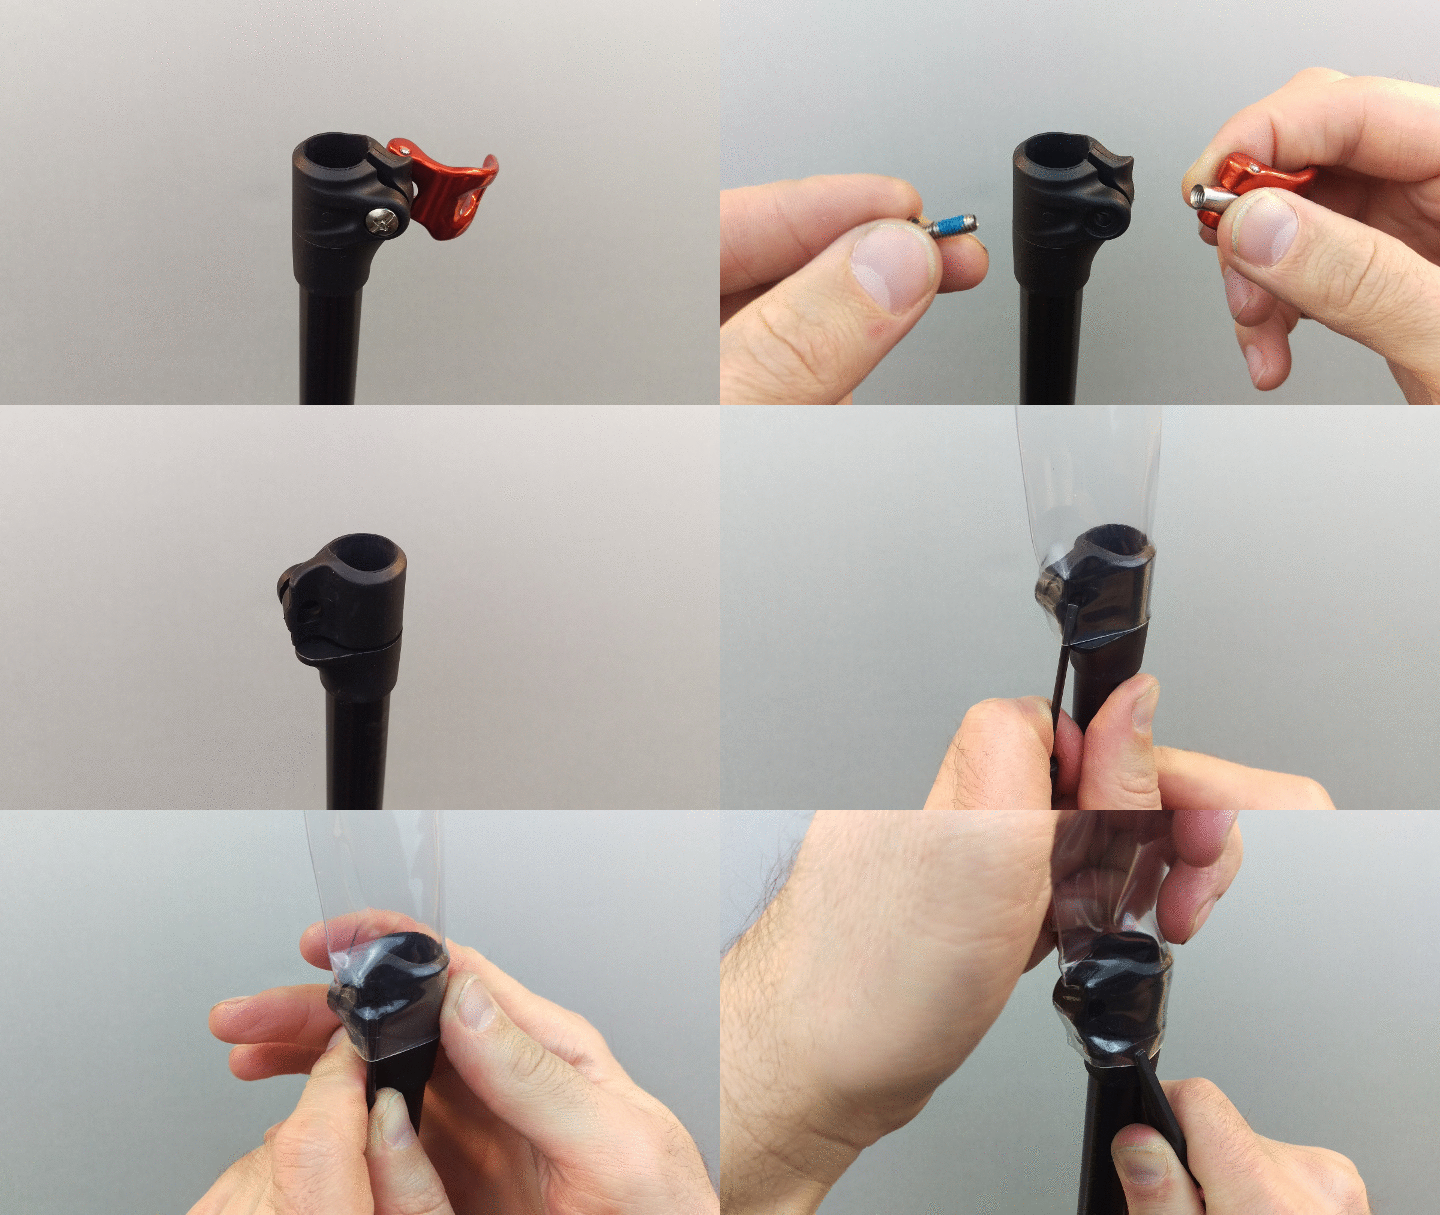
The adjustment mechanism on G3’s adjustable poles can be partially removed using a screwdriver. With the lever removed, the protective sleeve will just barely fit over the plastic piece with some prying and tugging, per the below animated image. Wrestle that sucker on there; it’s worth it.
Other Models
If nothing above helps you get that sleeve onto your pole, please contact us with specifics. If nothing else, we can mail you a clear adhesive wrap that’s almost as burly as that heat-shrink sleeve, and can be applied without disassembling your pole.


